No Knead Dutch Oven Bread
Highlighted under: Artisan Bakes
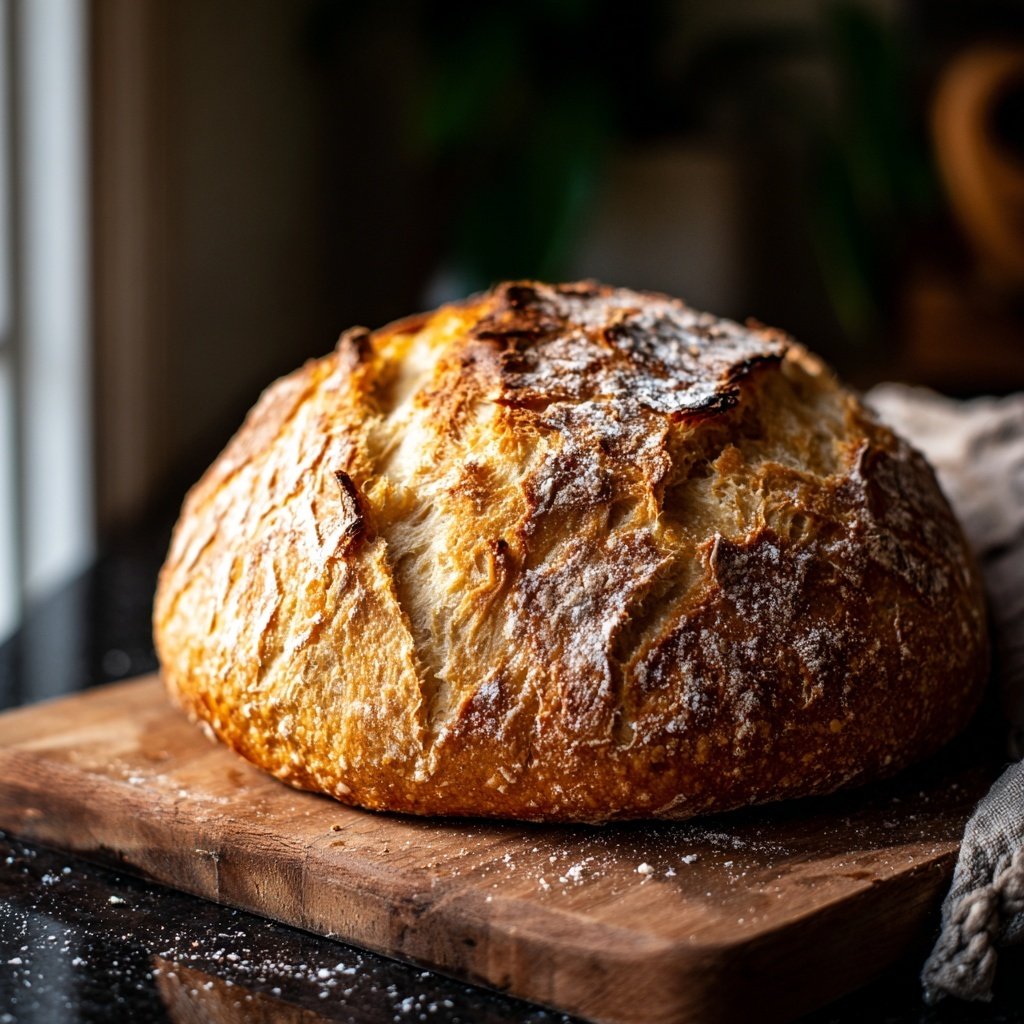
I absolutely love baking bread, and this No Knead Dutch Oven Bread recipe has become one of my all-time favorites! It combines simplicity and deliciousness, requiring minimal hands-on time while yielding an artisan-style loaf that comes out perfectly crusty on the outside and soft on the inside. With just a few basic ingredients and a dutch oven, I can create a fresh loaf that fills my home with an irresistible aroma. Perfect for sandwiches or as a side to a hearty soup, I can’t wait for you to try this with your loved ones!
When I first tried making No Knead Dutch Oven Bread, I was blown away by how effortless it was. The secret is in the slow rise, which develops flavor and texture without the need for traditional kneading. I left the dough to rise overnight, and the next day, all I had to do was bake it! This method really captures the essence of artisan bread without all the labor.
The dutch oven is a game changer for this recipe. It traps steam while the bread bakes, creating a beautifully crisp crust. I find that preheating the dutch oven is essential. This ensures that the bread rises nicely, resulting in a soft, airy interior. I love taking my fresh loaf straight from the oven and slicing into it with a pat of butter!
Why You Will Love This Recipe
- Simple preparation with minimal hands-on time
- Crusty exterior with a soft, airy interior
- Perfect for a variety of toppings or dips
Understanding the Dough
The dough for this No Knead Dutch Oven Bread is a wet, shaggy mixture, which is crucial for achieving that soft, airy interior. This texture helps create the steam necessary for a crusty exterior during baking. Don’t worry if it seems overly sticky at first; that’s a sign you're on the right track. If it’s too dry, you can add a tablespoon of water at a time until it feels right—smooth but still slightly tacky to the touch.
One of the remarkable aspects of this recipe is the long fermentation period. Letting the dough rise for 12 to 18 hours allows the flavors to develop beautifully, resulting in a bread that’s more complex than many quick-rise recipes. You'll know it’s ready when the surface is covered in bubbles, signaling that the yeast has done its job in creating an airy structure.
Perfecting Your Bake
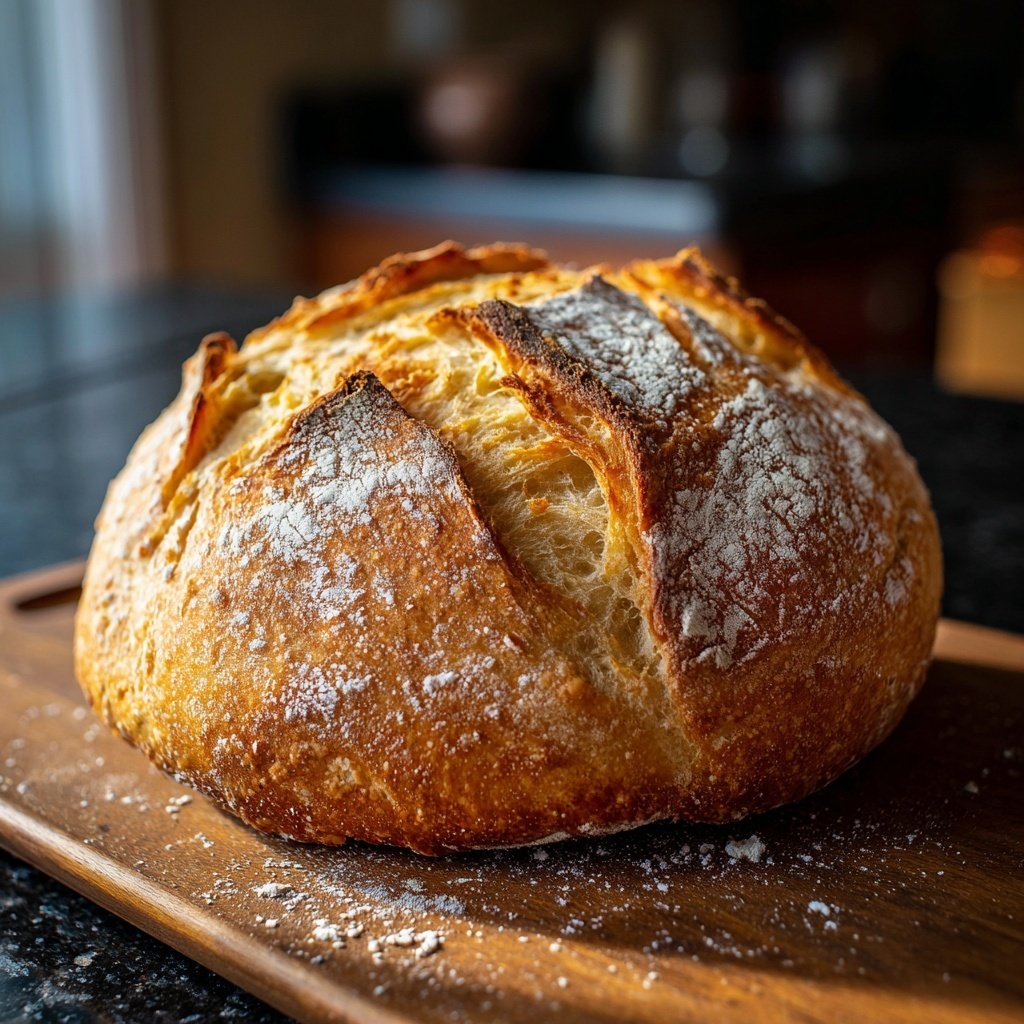
When it comes to baking, preheating your dutch oven is essential to replicate the conditions of a traditional steam oven. This step helps the bread rise with gentle heat and creates that coveted crisp crust. Make sure to keep the lid on for the first part of baking to trap steam. After 30 minutes, removing the lid allows the crust to caramelize for that golden-brown finish you’re seeking.
If you find that your bread isn’t browning as expected after the initial 15 minutes uncovered, consider repositioning your rack to a higher level in the oven or increasing the temperature slightly. Each oven behaves differently, and a little adjustment can be all it takes to achieve that perfect loaf.
Storing and Serving Your Bread
Once your bread has cooled, it’s important to store it properly to maintain freshness. I recommend placing it in a paper bag or wrapping it in a kitchen towel. Avoid plastic bags, as they trap moisture and can make the crust chewy. If you need to keep it for more than a couple of days, slice it and freeze it in an airtight container to maintain quality; it will keep well for up to three months.
This No Knead Dutch Oven Bread is extremely versatile! Pair it with a homemade soup, use it for sandwiches, or enjoy it simply with butter. If you want to make it even more special, consider adding herbs or cheese to the dough before baking for an extra flavor boost. This recipe invites creativity and customization, so feel free to make it your own!
Ingredients
For the Bread
- 3 cups all-purpose flour
- 1 1/4 teaspoons salt
- 1/2 teaspoon instant yeast
- 1 1/2 cups warm water
Make sure all your ingredients are at room temperature for optimal results.
Instructions
Mix the Dough
In a large bowl, combine the flour, salt, and instant yeast. Slowly add the warm water, stirring until a shaggy dough forms. Cover the bowl with plastic wrap and let it sit at room temperature for 12 to 18 hours until the surface is dotted with bubbles.
Shape the Dough
After the dough has risen, sprinkle a little flour on a clean surface and turn the dough out onto it. Fold the dough over itself a couple of times and let it rest for about 15 minutes.
Preheat the Oven
About 30 minutes before you are ready to bake, preheat your oven to 450°F (232°C) with the dutch oven inside.
Bake the Bread
Carefully remove the dutch oven from the oven and transfer the dough into it. Cover with the lid and bake for 30 minutes. Then, remove the lid and bake for an additional 15 minutes until golden brown.
Cool and Enjoy
Remove the bread from the dutch oven and let it cool on a wire rack before slicing. Enjoy your freshly baked bread with butter or your favorite spread!
For an added flavor twist, consider adding herbs or spices to the dough before the first rise.
Pro Tips
- For best results, keep the dutch oven covered during the first half of baking to achieve maximum crustiness.
Ingredient Notes
Using high-quality all-purpose flour will significantly impact the final texture of your bread. You might also consider using bread flour, which has a higher protein content, leading to an even chewier crumb. However, all-purpose flour works just fine and can yield fantastic results, particularly for a home baker without access to specialty flours.
The instant yeast used in this recipe requires no activation, which saves you time. However, if you only have active dry yeast, you can still use it—just dissolve it in the warm water before adding it to the flour. This will ensure that it activates properly and provides the necessary lift to your bread.
Troubleshooting Tips
If your loaf turns out denser than expected, it may have been due to insufficient fermentation time. Next time, allow it to rise longer and look for that bubbly surface to ensure optimal yeast activity before shaping. The dough should feel light and airy in your hands, indicating it’s ready for the next steps.
In the event that your crust is too hard, it may be an issue with oven temperature. Using an oven thermometer can help ensure you're baking at the right temperature. Additionally, experimenting with the amount of time you leave the lid on can also affect the crust texture; consider shortening its baking time if you prefer a softer crust.
Variations to Try
You can easily incorporate different flavors into your No Knead Dutch Oven Bread by adding ingredients like minced garlic, rosemary, or even some grated cheese to the dough before the first rise. This not only enriches the loaf but also allows for endless creativity in flavor combinations that can complement your recipes.
For a sweeter variation, mix in some honey or sugar along with spices like cinnamon and nutmeg. This can transform your artisan loaf into a delightful treat perfect for breakfast or dessert. Don’t hesitate to experiment with or without these additions to find your favorite take on this wonderful bread!
Questions About Recipes
→ Can I use whole wheat flour?
Yes, you can substitute up to half of the all-purpose flour with whole wheat flour for a nuttier flavor.
→ How long does the bread last?
The bread can be stored in a paper bag for up to 3 days or frozen for longer storage.
→ Do I need to knead the dough?
No, this recipe requires no kneading; the long fermentation time develops gluten naturally.
→ Can I add ingredients like cheese or olives?
Absolutely! You can fold in cheese, herbs, or olives during the shaping step for extra flavor.
No Knead Dutch Oven Bread
What You'll Need
For the Bread
- 3 cups all-purpose flour
- 1 1/4 teaspoons salt
- 1/2 teaspoon instant yeast
- 1 1/2 cups warm water
How-To Steps
In a large bowl, combine the flour, salt, and instant yeast. Slowly add the warm water, stirring until a shaggy dough forms. Cover the bowl with plastic wrap and let it sit at room temperature for 12 to 18 hours until the surface is dotted with bubbles.
After the dough has risen, sprinkle a little flour on a clean surface and turn the dough out onto it. Fold the dough over itself a couple of times and let it rest for about 15 minutes.
About 30 minutes before you are ready to bake, preheat your oven to 450°F (232°C) with the dutch oven inside.
Carefully remove the dutch oven from the oven and transfer the dough into it. Cover with the lid and bake for 30 minutes. Then, remove the lid and bake for an additional 15 minutes until golden brown.
Remove the bread from the dutch oven and let it cool on a wire rack before slicing. Enjoy your freshly baked bread with butter or your favorite spread!
Extra Tips
- For best results, keep the dutch oven covered during the first half of baking to achieve maximum crustiness.
Nutritional Breakdown (Per Serving)
- Calories: 400 kcal
- Total Fat: 1g
- Saturated Fat: 0g
- Cholesterol: 0mg
- Sodium: 600mg
- Total Carbohydrates: 88g
- Dietary Fiber: 4g
- Sugars: 0g
- Protein: 12g